 Audio (113) Audio (113)
Datatype (15)
Demo (64)
Development (262)
Document (70)
Driver (20)
Emulation (70)
Game (586)
Graphics (234)
Library (23)
Network (67)
Office (22)
Utility (293)
Video (19)
Total files: 1858
Full index file
Recent index file
Part of Aros World Exec |
PolarPaint | | Description: | Paint and Amimation program made with Hollywood | | Download: | polarpaint_aros.lha (TIPS: Use the right click menu if your browser takes you back here all the time) | | Size: | 4Mb | | Version: | 1.381 | | Date: | 18 Apr 26 | | Author: | Anbjørn Myren | | Submitter: | amiwell79 | | Email: | amiwell/virgilio it | | Requirements: | aros i386 abiv0 | | Category: | graphics/edit | | Replaces: | graphics/edit/polarpaint_aros.lha | | License: | Other | | Distribute: | yes | | FileID: | 3253 | | | | Snapshots:
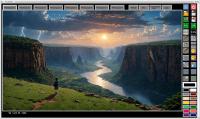 | |
| | Comments: | 0 | | Snapshots: | 1 | | Videos: | 0 | | Downloads: | 27 (Current version) | | 177 (Accumulated) | | Votes: | 0 (0/0) (30 days/7 days) | |
[Show comments] [Show snapshots] [Show videos] [Show content] [Replace file] PolarPaint v1.3 (r81) by Anbjørn Myren (anbjorn.myren()gmail.com)
This is an experimental Paint program made with Hollywood.
Requirements:
A fast computer with RTG, minimum 1440x900x16 (Program window 1385x820)
Minimum 40MB of free ram, 64MB or more recommended.
The small version require 800x600 (730x570) and needs 32MB ram.
More memory or diskspace might be desirable (read below for memory notes)
codesets.library 6.22+ and reqtools.library v39+
Versions for 68k, AmigaOS4, MorphOS and AROSx86 available
PDF manual is available as a separate download.
Functions in brief (not complete, look in the PolarPaint manual for more)
The painting area is 1280x720, 640x480 for the small version.
Up to 8 Workspaces can be used for separate drawings.
There is an Undo/Redo funtion. By default this is set to maximum 10 levels,
but can be set as high as 100. Each Workspace have its own Undo buffer, in
theory there might up to 800 undo's.
At program start Workplace 1 will be active. Click on one of the numbered
Workspace Tab's to use another workspace.
Animation features was added in r79 as well as Pixel like editing in zoommode
Memory notes
Each brush initiated will take about 4MB of memory. Opening a new workspace
consumes 4 MB per Workspace (unless diskbuffer is used).
The Undo / Redo system will also require memory since each Undo is a full
brush stored in memory.
If you set the Undo buffer to max (100) and use all 8 Workspaces you will in
theory have 800 undo operations available. Needless to say this will require
massive amounts of RAM available.
Diskbuffering
As a workaround for the memory issues mentioned above I made an optional
setting that allows you to enable DiskBuffering. This means that all Undo
buffering goes to your hardrive instead of using RAM. Also when opening a
new workspace the previous workspace is saved to disk and freed from memory.
By default these files are stored as PNG images which means they only take a
fraction of the space compared to the memory they would need.
The downside is that the undo/redo will be slower, because it needs to load
the files from disk and convert the png files into brush data.
If you suspect you might get short on memory, run the program first time and
press the Quit button, at the requestor select to Enable DiskBuffer before
quitting. Next time you launch the program diskbuffer will be enabled.
When DiskBuffer is active you will be asked on Exit if you want to keep the
buffer files. If you do so, they will be loaded automaticly on next start and
you can keep on working where you left off.
Help
There is an Information icon that will display some basic information about
the program, and while the icon is highlighted (info mode) the user can click
any icon to get some pop-up information about each button.
Click the info icon again to exit information mode.
Flood Fill
Regular floodfill is an in-built Hollywood command that works well in most
cases. But if you want to floodfill an area that has gradients of colors you
might experience that not all areas are filled as expected. An image saved
with JPEG compression will most likely have this issue.
To overcome this there is a custom fill command that uses a threshold setting
to determine how colors are filled. By default threshold is set to 0 and then
the in-built fill command us used. Setting threshold above 0 will make use of
the custom fill operation. The setting is quite sensitive so depending on
your image there could be a huge difference between 0 and 1.
You can use decimal values, eg. 0.01 or 0.5 so just try until satisfied.
The custom fill operation is much slower than the regular fill, specially on
low end computers. The way it works it will read the color form pixel by
pixel and create a table of pixels to fill.
For lower Threshold values it will process up to 1% of the image area before
filling, then process the next bacth until done.
For Threshold values 30% and higher the processing is much slower, so it
will then process only a user selectable area size all in one go.
Processing with high threshold will also consume memory.
As a general rule you need a system with 64MB RAM to process
sizes up to 5%, 128MB up to 50% and so on.
Use ESC to interupt an ongoing floodfill operation.
Transparency
There are two modes for transparency available. Default and Instant. The
default mode with process your whole line before applying transparency,
making it more smooth. The line will appear solid while the mouse is pressed.
The Instant mode will apply transparence as you draw, but will leave "dots"
along the line. This is because you really is drawing many short connecting
lines and the "dots" appear where these lines overlap.
For Lines, Boxes and Circles transparency is only available in Default mode.
Keyboard shortcuts
1 to 8 - select workspace
Amiga + O - Open animation file
Amiga + A - Create a new animation
Amiga + W - Write to next animiation frame. Will Add a new frame If current
frame is the last frame.
Amiga + U - Write To current animiation frame
Amiga + N - Go To Next frame
Amiga + P - Go To Previous frame
Amiga + G - Write guidelines. Draws thin gray lines To mark the size of the
current animation
Notes:
The icon is from the aminet archive pix/gicon/glowcollection.lha
Changelog
v81 Fix - Check that filename is not same as input file when saving with
delay
RMB button change when switching mode
Missing filters in save fil requestors
v80 Menu activation button labeled RMB to toggle the usage of RMB button
(menu or draw)
Fix: Creating a new anim could crash if the anim was larger than half
the workspace area
Removed a few overlapping keyboard shortcuts
Bugfix, save anim with delay crashed on some systems
Anim can now also be created in APNG format
v79 Animation features added, controlled by menu
Added menu for animation features.
Disabled Ctrl-C to quit.
Pixel mode when drawing in zoomed mode
Pixel mode for line drawing in zoomed mode
Pixel mode for rectangle drawing in zoomed mode
v78 Optional smoothening for the rotating effect
Added one undo operation before entering zoom mode
v77 Adjustable Bluring level
More detailed Position info when capturing brush. Press "m" to
display mouse coordinates, and also center xy coords of brush.
Right mouse button on brush icon (if brush is captured) to enter XY
coordinates for exact brush paste.
Press "s" to apply a smoothening effect.
r76 Bugfix - quit from info window
r75 Improved sprayeffect
r74 Loading size detection bugfix, shortcut keys changed/bugfix,
r73 Experimental spray effect / multidot
r72 Brush RMB position fix. Corrected transparency requestor info.
r71 Bug fixes for the undo/redo system, and shortening repetative code.
Now working on A600GS.
r70 Complete rewrite of the undo / redo stack management system.
r69 Zoom can now be active on multiple workspaces simultaniously
Partly loaded images can be on loaded on multiple workspaces
simultaniously
r68 Rectangle starting point will now compensate for border, also when
drawing with rotation.
Option to scale down a brush which was captured or loaded while in
zoomed mode.
Rotate Text object
Fix, multiple usage of same brush id (16)
r67 Arc center and ellipse center gets correct center alligned at any
angle, regardless of bordersize
New: draw rotated rectangles
RGB values for all color change operation shows in status area
r66 Corrected Arc centering
r65 New: Draw Arc
r64 New, Draw lines, circles, ellipses and rectangles by coordinates
r63 Effects adjustment
Improved rotate effect, now centers properly
Brush now adjusts to center of brush relative to mouse position
Status line now also displays size of imported brushes and size of
drawn shapes, and RGB values of pickcolor
Fix: RMB to replacecolor required extra leftmouse buttonpress
Fix: endselect() in threshold floodfill caused an exit-error
Fix: fill shape reset
r62 Fix: GUI glitches after drawing shapes with gradient
Fix: Tranparencydraw with filled shapes now works
Improved effect settings
r61 Handle load errors without force quit
r60 Brush capture aligned to center of pointer (cross)
Abandon brush capture by ESC or if LMB is pressed outside boundries.
r59 Improved scaling when loading larger images
New: ability to load parts of larger images by coordinates and save
merge it with source image and save it in original size.
Fixed broken brush toggle by using the pencil button
Realigned right side icons, reduced window width to 1385
r58 New, circle drawing
Waitleftmouse in replacecolor function to avoid double action
Bugfix: sometimes drawing small ellipse and circles did blank the
drawing or rectangles vanish
r57 New 8x Zoom function to fine edit a selected area
Adjusted coordinates for some RMB settings
r56 Reset textcolor after drawing text
Rename variable in drawline + rename in comment
Line draw fix (draw straigt lines)
Rectangle draw improvement
r55 Merge floodfill functions
Transparent mix now can set transparency for both workspaces
seperately
r54 Fix: Drawing Rectangles, Ellipses and Lines when foreground and
background color is the same was not working.
Fix: Removed duplicate undos'
White CLS, If pen is White, then change pen to Black.
Drawing coordinates adjusted (near edges)
Deselect active brush capture when click to the left of the drawing
area
r53 RMB For settings (icons updated)
New: Gradient fill
New: Fill box
New: ReplaceColor
New: TextObject button
Transparency settings changed.
Fixed RMB transparency draw
New: Multipen draw
Black CLS, If pen is Black, then change pen to White.
r52 FloodFill, different handling for threshold > 49
New: PickColor
Fix: Save to root (eg. RAM: failed)
r51 and earlier builds have no recorded log
|
